How to create badge in iOS

07 February 2020
With every new version of your mobile app you have something new to share with the user. The best solution is to hint it with a visual clue. But how to make that gently without annoying the user and keep him curious?
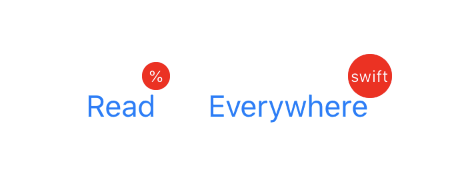
The best and most common approach is to add a notification badge. Yes, this is the tiny red dot at the top which we all know. This might not fit to your color scheme, then let’s discuss how to make that with code so you can customize it later. The follow snippet shows an elegant solution. The developer can override the default behavior. Protocol oriented principle is used here. This keeps the code clean and reusable.
//  Created by © 2020 SwiftEverywhere. Can be used free of charge.
import UIKit

//protocol
protocol BadgeContainer: class {
    var badgeView: UIView? { get set }
    var badgeLabel: UILabel? { get set }
    func showBadge(blink: Bool, text: String?)
    func hideBadge()
}

//default protocol implementation
extension BadgeContainer where Self: UIView {
    func showBadge(blink: Bool, text: String?) {
        if badgeView != nil {
            if badgeView?.isHidden == false {
                return
            }
        } else {
            badgeView = UIView()
        }

        badgeView?.backgroundColor = .red
        guard let badgeViewUnwrapped = badgeView else {
            return
        }

        //adds the badge at the top
        addSubview(badgeViewUnwrapped)
        badgeViewUnwrapped.translatesAutoresizingMaskIntoConstraints = false

        var size = CGFloat(6)
        if let textUnwrapped = text {
            if badgeLabel == nil {
                badgeLabel = UILabel()
            }

            guard let labelUnwrapped = badgeLabel else {
                return
            }

            labelUnwrapped.text = textUnwrapped
            labelUnwrapped.textColor = .white
            labelUnwrapped.font = .systemFont(ofSize: 8)
            labelUnwrapped.translatesAutoresizingMaskIntoConstraints = false

            badgeViewUnwrapped.addSubview(labelUnwrapped)
            let labelConstrainst = [labelUnwrapped.centerXAnchor.constraint(equalTo: badgeViewUnwrapped.centerXAnchor),                                    labelUnwrapped.centerYAnchor.constraint(equalTo: badgeViewUnwrapped.centerYAnchor)]
            NSLayoutConstraint.activate(labelConstrainst)

            size = CGFloat(12 + 2 * textUnwrapped.count)
        }

        let sizeConstraints = [badgeViewUnwrapped.widthAnchor.constraint(equalToConstant: size), badgeViewUnwrapped.heightAnchor.constraint(equalToConstant: size)]
        NSLayoutConstraint.activate(sizeConstraints)

        badgeViewUnwrapped.layer.cornerRadius = size / 2

        let position = [badgeViewUnwrapped.topAnchor.constraint(equalTo: self.topAnchor, constant: -size / 2),
        badgeViewUnwrapped.trailingAnchor.constraint(equalTo: self.trailingAnchor, constant: size/2)]
        NSLayoutConstraint.activate(position)

        if blink {
            let animation = CABasicAnimation(keyPath: "opacity")
            animation.duration = 1.2
            animation.repeatCount = .infinity
            animation.fromValue = 0
            animation.toValue = 1
            animation.timingFunction = .init(name: .easeOut)
            badgeViewUnwrapped.layer.add(animation, forKey: "badgeBlinkAnimation")
        }
    }

    func hideBadge() {
        badgeView?.layer.removeAnimation(forKey: "badgeBlinkAnimation")
        badgeView?.removeFromSuperview()
        badgeView = nil
        badgeLabel = nil
    }
}
To use it with a button you have to extend the UIButton class as follows:
//custom class
class BadgeButton: UIButton, BadgeContainer {
    var badgeTimer: Timer?
    var badgeView: UIView?
    var badgeLabel: UILabel?
}
After that you can associate any button in your storyboard or use it in your code. No need to do much if you want to use it with other UIView components. Just add the class/structure to suffice the requirements by the BadgeContainer protocol as in the example above.
Ok, so how do we use it? We just call the method showBadge(blink: , text:). The blink will attract extra attention to the badge, if you want a cool pulse animation. Text is what you will see in the badge. You can customize the badgeView and badgeLabel however you like as in the example below:
@IBOutlet weak var button: BadgeButton!

override func viewDidLoad() {
    super.viewDidLoad()

    button.showBadge(blink: false, text: "swift")
    button.badgeView?.backgroundColor = .blue
    button.badgeLabel?.textColor = .orange
}
And don’t forget to hide the badge when you no longer need it with:
button.hideBadge()