How to use vector images in Xcode

25 February 2021
Xcode 7 gave us the ability to add pdf files to use as vectors but it was pre generating images for all sizes that we need (1x, 2x, 3x you know the drill). What Xcode 12 added last year was the ability to preserve its vector data and also SVG support as well. In this post we are going to explain how to use that in your project.
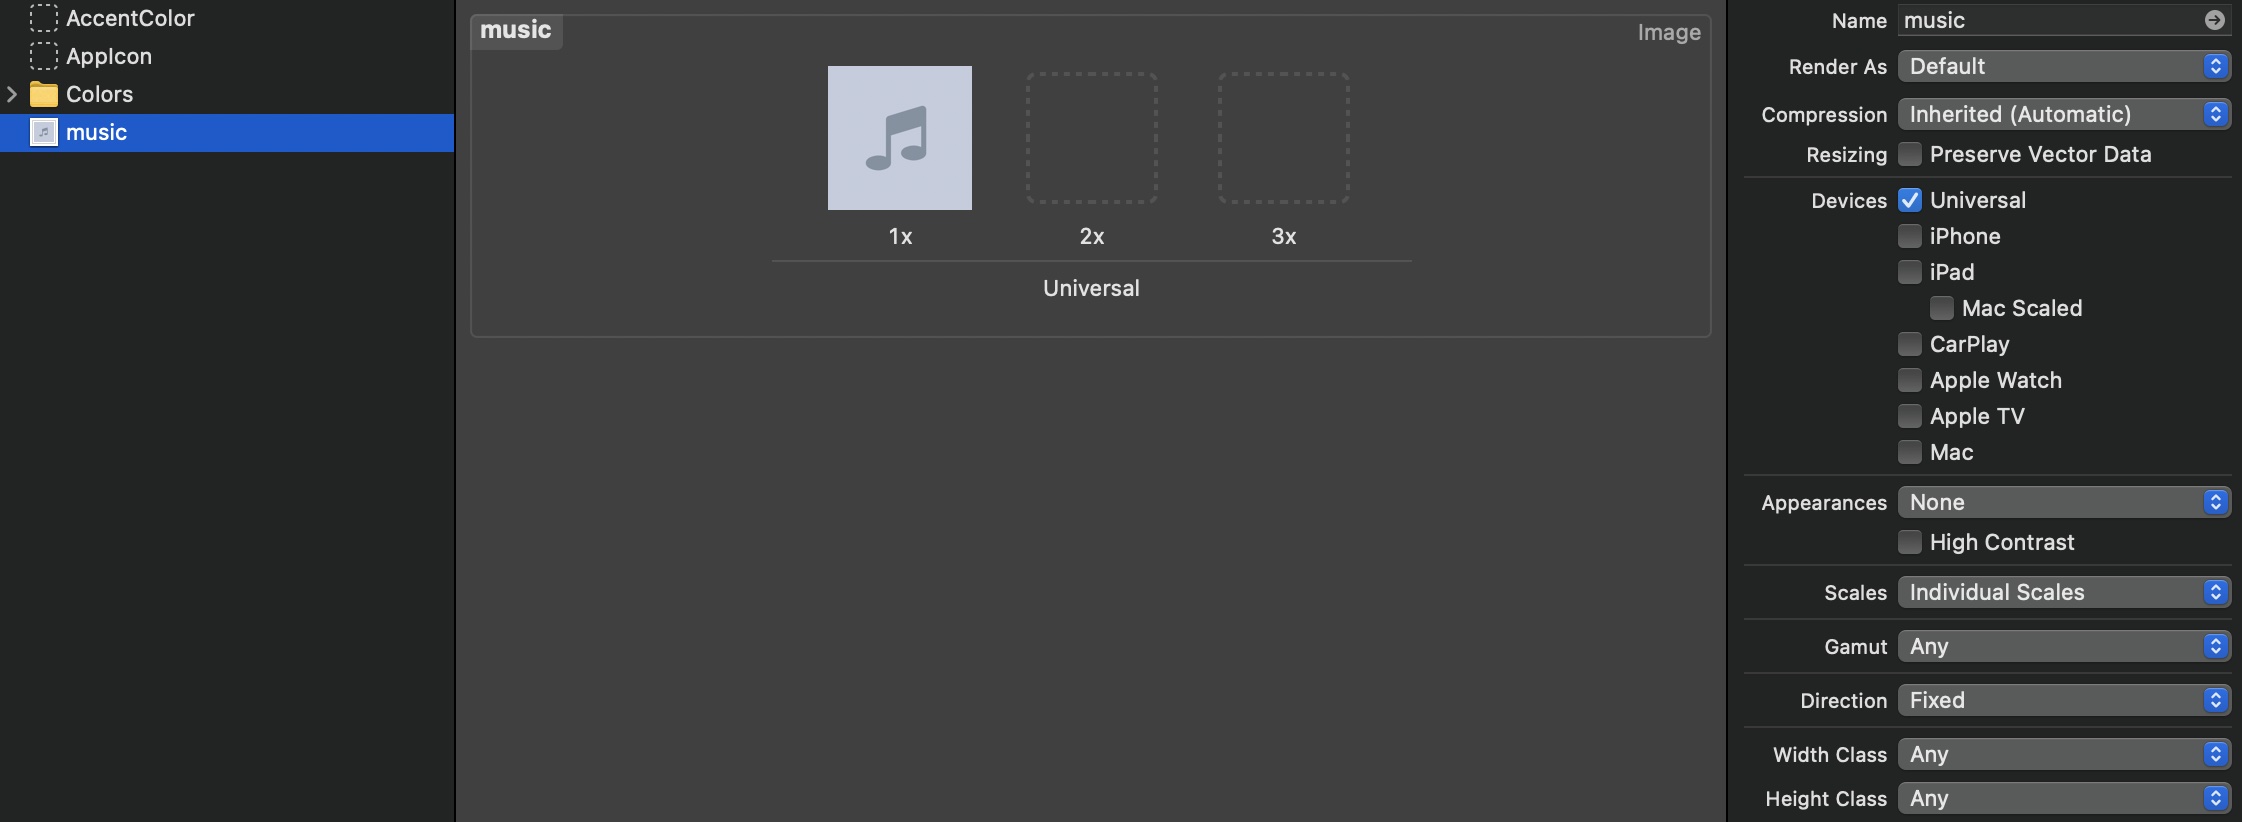
In your asset catalog (usually named Assets.xcassets) just drag and drop your desired pdf or svg vector file. It should look something like this at first:

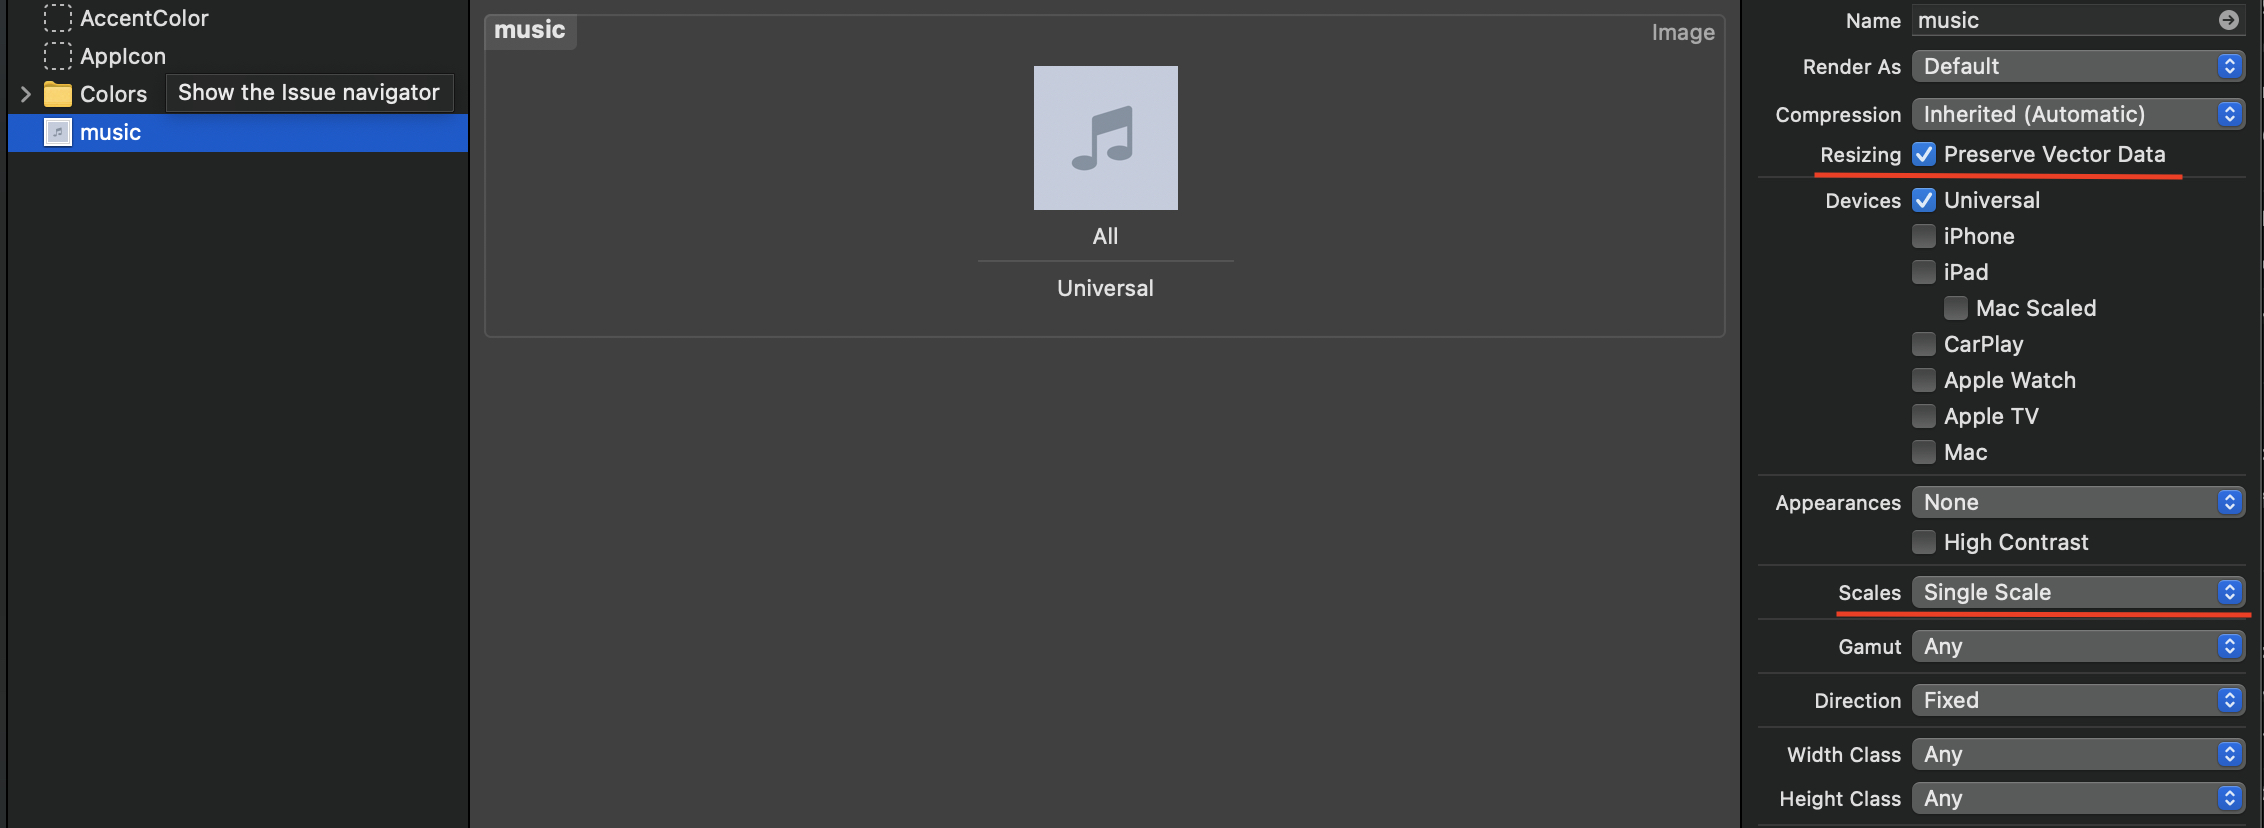
Now you need to select some options that we highlighted in red in this screenshot:

- Check the checkbox next to “Resizing” named “Preserve Vector Data”.
- Select “Single Scale” from the dropdown in the “Scales” option.
This is the whole image setup in the assets catalog, we just need to go through how to use it in a UIImageView.

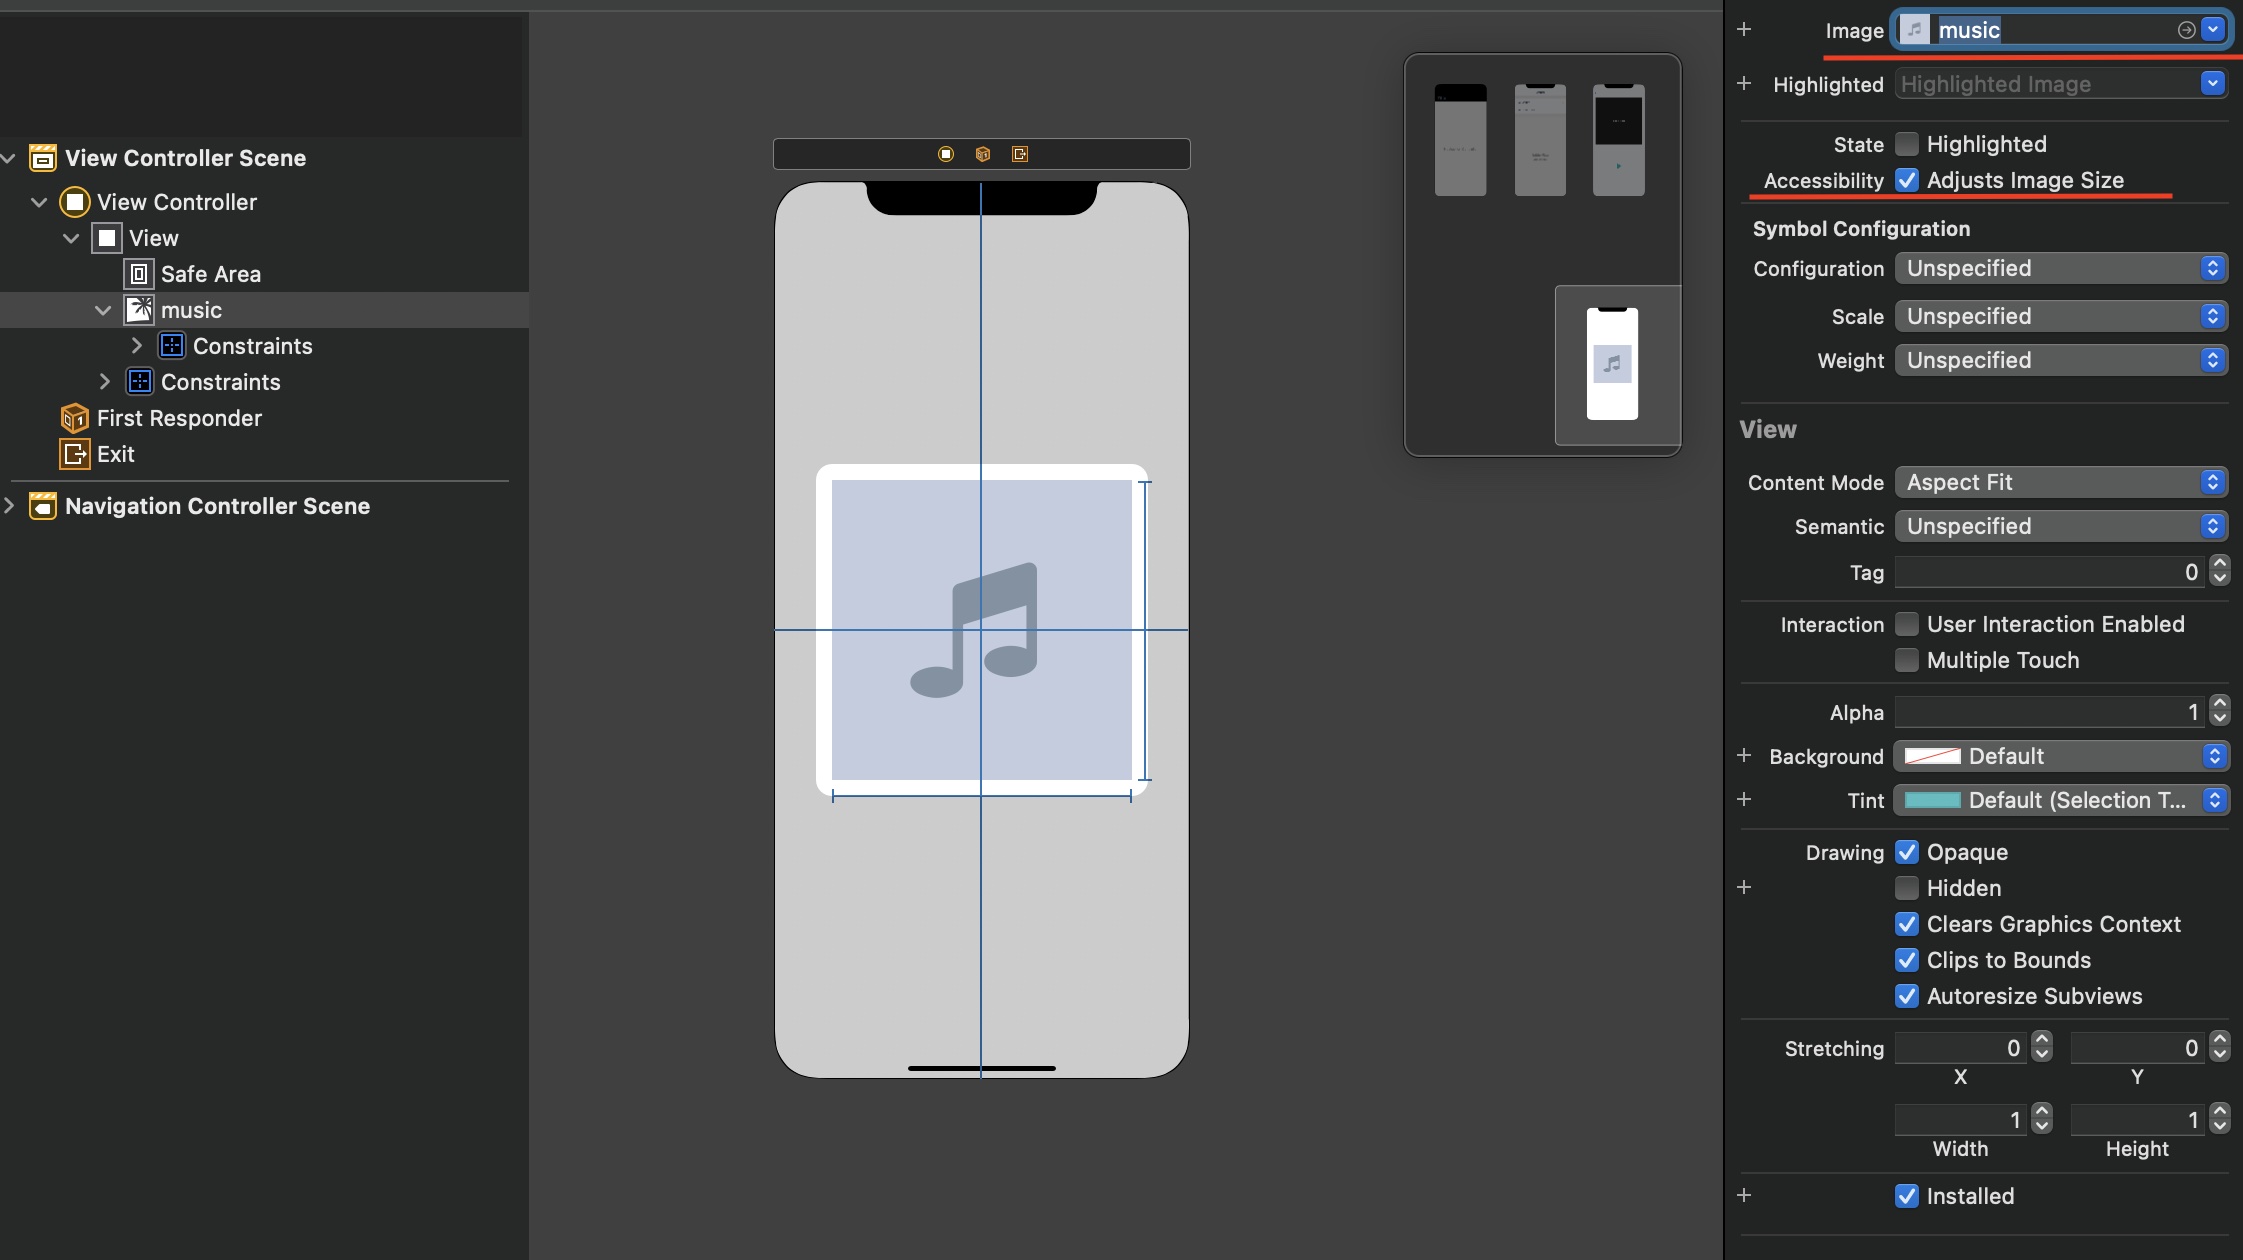
- Add you
UIImageViewand set your vector as its image, just as you do it normally. - Make sure to check the “Adjusts Image Size” checkbox next to “Accessibility”. If you are not using Interface Builder you need to set
adjustsImageSizeForAccessibilityContentSizeCategorytotruein yourUIImageView
A few problems that you can run into:
- Some users have informed us that it wasn’t using the vector data when using Dark mode. Their solution was to always set the image programmatically and not using the Interface Builder.
- If one of the superviews of the
UIImageViewor itself hasshouldRasterizeproperty set totruein itslayerit will not use the vector data and the image may look pixelated.